
#060
Poliwag
water
Description
Tadpole Pokémon
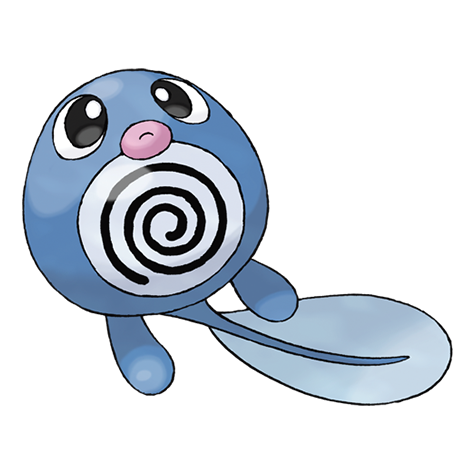
For Poliwag, swimming is easier than walking. The swirl pattern on its belly is actually part of the Pokémon’s innards showing through the skin.
- Gender Ratio
- 50% Male / 50% Female
- Catch Rate
- 255
- Egg Groups
- water1
- Classification
- —
Sprites
Base Stats
HP40
Atk50
Def40
SpA40
SpD40
Spe90
Total300
Abilities
Water Absorb
Absorbs Water moves, healing for 1/4 max HP.
Damp
Prevents Self-Destruct, Explosion, and Aftermath from working while the Pokémon is in battle.
Swift Swim
Hidden AbilityDoubles Speed during rain.
Moves Learnt by Level Up
LevelMoveType1Bubblewater1Water Sportwater6Poundnormal12Mud Shotground16Hypnosispsychic18Bubble Beamwater19Water Gunwater24Rain Dancewater25Double Slapnormal26Low Kickfighting31Body Slamnormal35Wake Up Slapfighting36Earth Powerground38Amnesiapsychic41Mud Bombground45Hydro Pumpwater48Belly Drumnormal54Double Edgenormal
Learnable Moves
MoveMethodTypeAmnesiaLevel UpTMpsychicAttractTMnormalBelly DrumLevel UpnormalBideTMnormalBlizzardTMiceBody SlamLevel UpTMTutornormalBubbleLevel UpwaterBubble BeamEggLevel UpTMwaterBulldozeTMgroundCaptivateTMnormalChilling WaterTMwaterConfideTMnormalCurseTMghostDefense CurlTMTutornormalDigTMgroundDiveTMTutorwaterDouble EdgeLevel UpTMTutornormalDouble SlapLevel UpnormalDouble TeamTMnormalEarth PowerLevel UpTMgroundEncoreEggTMnormalEndeavorEggTMTutornormalEndureEggTMTutornormalFacadeTMnormalFocus PunchTMfightingFrustrationTMnormalHailTMiceHazeEggTMiceHeadbuttTMTutornormalHelping HandTMTutornormalHidden PowerTMnormalHydro PumpLevel UpTMwaterHypnosisLevel UppsychicIce BallEggiceIce BeamTMTutoriceIcy WindTMTutoriceLiquidationTMwaterLow KickLevel UpTMfightingMimicTMTutornormalMind ReaderEggnormalMistEggiceMud BombLevel UpgroundMud ShotEggLevel UpTMgroundMud SlapTMgroundMuddy WaterEggTMwaterNatural GiftTMnormalPoundLevel UpnormalProtectTMnormalPsychicTMpsychicPsywaveTMpsychicRageTMnormalRain DanceLevel UpTMwaterRefreshEggnormalRestTMpsychicReturnTMnormalRoundTMnormalScaldTMwaterSecret PowerTMnormalSkull BashTMnormalSleep TalkTMTutornormalSnoreTMTutornormalSplashEggnormalSubstituteTMTutornormalSurfTMwaterSwaggerTMTutornormalSwiftTMnormalTake DownTMnormalTera BlastTMnormalThiefTMdarkToxicTMpoisonWake Up SlapLevel UpfightingWater GunLevel UpTMwaterWater PulseEggTMTutorwaterWater SportEggLevel UpwaterWaterfallTMwaterWeather BallTMnormalWhirlpoolTMwater
Type Effectiveness
Attacking
Super Effective Against (2×)
firegroundrock
Not Very Effective Against (½×)
watergrassdragon
Defending
Weak to (2×)
electricgrass
Resists (½×)
firewatericesteel
Where to Find
Blue
LocationMethodLevelChanceSeafoam Islands B3fGood Rod1050%Seafoam Islands B4fGood Rod1050%Kanto Route 12Good Rod1050%Kanto Sea Route 19Good Rod1050%Kanto Sea Route 20Good Rod1050%Cinnabar IslandGood Rod1050%Viridian CityGood Rod1050%Viridian CitySuper Rod1525%Cerulean CityGood Rod1050%Vermilion CityGood Rod1050%Celadon CityGood Rod1050%Fuchsia CityGood Rod1050%Pallet TownGood Rod1050%Pallet TownSuper Rod1525%Kanto Route 6Good Rod1050%Kanto Route 10Good Rod1050%Kanto Route 11Good Rod1050%Kanto Route 13Good Rod1050%Kanto Route 17Good Rod1050%Kanto Route 18Good Rod1050%Kanto Sea Route 21Good Rod1050%Kanto Route 22Good Rod1050%Kanto Route 22Super Rod1525%Kanto Route 24Good Rod1050%Kanto Route 25Good Rod1050%Cerulean Cave 1fGood Rod1050%Cerulean Cave B1fGood Rod1050%Kanto Route 23Good Rod1050%Kanto Safari Zone MiddleGood Rod1050%Kanto Safari Zone Area 1 EastGood Rod1050%Kanto Safari Zone Area 2 NorthGood Rod1050%Kanto Safari Zone Area 3 WestGood Rod1050%Vermilion City Ss Anne DockGood Rod1050%
Red
LocationMethodLevelChanceSeafoam Islands B3fGood Rod1050%Seafoam Islands B4fGood Rod1050%Kanto Route 12Good Rod1050%Kanto Sea Route 19Good Rod1050%Kanto Sea Route 20Good Rod1050%Cinnabar IslandGood Rod1050%Viridian CityGood Rod1050%Viridian CitySuper Rod1525%Cerulean CityGood Rod1050%Vermilion CityGood Rod1050%Celadon CityGood Rod1050%Fuchsia CityGood Rod1050%Pallet TownGood Rod1050%Pallet TownSuper Rod1525%Kanto Route 6Good Rod1050%Kanto Route 10Good Rod1050%Kanto Route 11Good Rod1050%Kanto Route 13Good Rod1050%Kanto Route 17Good Rod1050%Kanto Route 18Good Rod1050%Kanto Sea Route 21Good Rod1050%Kanto Route 22Good Rod1050%Kanto Route 22Super Rod1525%Kanto Route 24Good Rod1050%Kanto Route 25Good Rod1050%Cerulean Cave 1fGood Rod1050%Cerulean Cave B1fGood Rod1050%Kanto Route 23Good Rod1050%Kanto Safari Zone MiddleGood Rod1050%Kanto Safari Zone Area 1 EastGood Rod1050%Kanto Safari Zone Area 2 NorthGood Rod1050%Kanto Safari Zone Area 3 WestGood Rod1050%Vermilion City Ss Anne DockGood Rod1050%
Yellow
LocationMethodLevelChanceSeafoam Islands B3fGood Rod1050%Seafoam Islands B4fGood Rod1050%Kanto Route 12Good Rod1050%Kanto Sea Route 19Good Rod1050%Kanto Sea Route 20Good Rod1050%Cinnabar IslandGood Rod1050%Viridian CityGood Rod1050%Viridian CitySuper Rod5-1540%Cerulean CityGood Rod1050%Vermilion CityGood Rod1050%Celadon CityGood Rod1050%Fuchsia CityGood Rod1050%Pallet TownGood Rod1050%Kanto Route 6Good Rod1050%Kanto Route 10Good Rod1050%Kanto Route 11Good Rod1050%Kanto Route 13Good Rod1050%Kanto Route 17Good Rod1050%Kanto Route 18Good Rod1050%Kanto Sea Route 21Good Rod1050%Kanto Route 22Good Rod1050%Kanto Route 22Super Rod5-1540%Kanto Route 24Good Rod1050%Kanto Route 25Good Rod1050%Cerulean Cave 1fGood Rod1050%Cerulean Cave B1fGood Rod1050%Kanto Route 23Good Rod1050%Kanto Route 23Super Rod25-3040%Kanto Safari Zone MiddleGood Rod1050%Kanto Safari Zone Area 1 EastGood Rod1050%Kanto Safari Zone Area 2 NorthGood Rod1050%Kanto Safari Zone Area 3 WestGood Rod1050%
Evolution
Want a different layout? Customize panel order